


Freestanding tub plumbing rough-in is not “just moving a drain.” It is a layout and geometry problem: the drain, trap, and vent must land in a tight area under a tub you can’t easily shift later, and the water supplies (often for a floor-mount filler) have to come up in exactly the right place and stay rigid. In real homes, the rough-in fails for a few repeat reasons: the drain stub is too close to the tub’s centerline for a P-trap to physically fit, the riser wasn’t dry-fit and centered before glue/tile, the finished floor height changed the tailpiece connection, or the filler valve ended up too low or too close to the rim so handles hit hands, walls, or doors. This guide focuses on execution and compatibility—how to tell if a freestanding tub plumbing rough-in will work in your floor, what measurements to verify, and what gets expensive or annoying when it doesn’t.
Should you choose Freestanding Tub Plumbing Rough-in in your home? (Decision Snapshot)
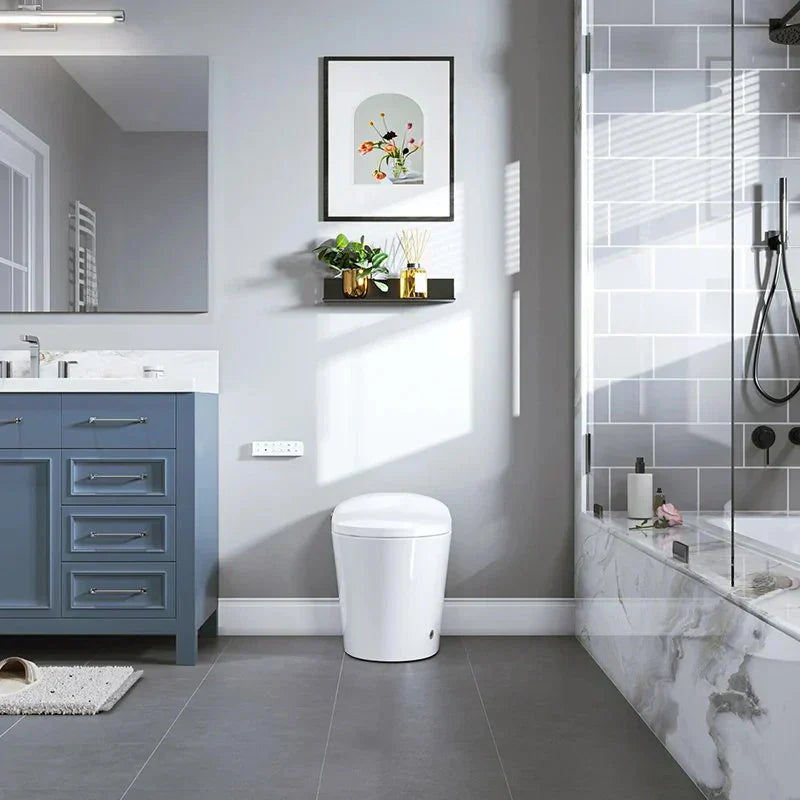
A successful freestanding tub installation depends on whether your drain and vent can be properly aligned within the tub’s allowable drain zone, and whether you have enough clearance for the P-trap and slope. For homeowners considering an oval design, planning the rough-in plumbing for oval tub early ensures you can dry-fit, test, and adjust before the floor is sealed, avoiding costly corrections later.
Pre-check inputs:
-
Tub spec-sheet drain dimensions
-
Foundation type (slab vs framed)
-
Access below (yes/no)
Choose it when your drain and vent can land inside the tub’s “drain zone” with enough trap offset room (and you can still test before closing the floor)
Freestanding tub rough-in makes sense when:
-
You can place the drain riser within the tub’s allowable drain zone (not just “near the middle of the bathroom”).
-
There’s enough horizontal room under the tub for a real P-trap and a proper slope to the main line.
-
You can dry-fit the tub and drain and run a real water test before the floor is sealed (tile, waterproofing, slab patch).
-
You have a plan for service: access from below, removable panel nearby, or at least a tub you can lift without destroying the floor.
Hard no / high-risk
-
You’re on a slab and the drain is stubbed up too close to the exact center of where the tub drain needs to land, leaving no room for the trap body and fittings.
-
The bathroom below is finished and you cannot open the ceiling for adjustments.
-
You can’t dry-fit the tub and perform a fill-and-dump test before closing the floor.
-
Keeping tile, heated floors, or waterproofing intact prevents any later corrections without destructive work.
Avoid or rethink it on slab or finished floors when the drain is near the tub centerline and you can’t physically place a P-trap without breaking concrete
This rough-in becomes a bad deal when:
-
You’re on a slab and the drain is stubbed up too close to the exact center of where the tub drain needs to land. That sounds correct, but it often leaves no room for the trap body and fittings. The “fix” is usually cutting concrete and moving pipe back to where a trap can sit.
-
The bathroom below is finished and you cannot open the ceiling. If anything is off by even a small amount, there is no simple adjustment later.
-
You’re trying to keep tile, heated floors, or waterproofing intact. Once those go in, corrections get destructive fast.
Proceed only if your floor-mount filler location has wall/door clearance and the valve height won’t crowd handles above the tub rim
Floor-mounted fillers add their own failure points:
-
The supply location must be far enough from the tub rim to use the handles comfortably and avoid constant splashing.
-
The filler needs solid anchoring. If it moves, the movement telegraphs into the floor penetrations and connections.
-
Many “by-the-drawing” valve heights feel cramped in real life. If the handles land just an inch or two above the rim, it works on paper and feels wrong in use.
Rule of thumb: if you can’t dry-fit the tub, confirm trap space, and pressure/leak test before the floor is closed, freestanding tub plumbing rough-in is a high-risk choice—especially on slab.
What trade-offs does this rough-in force vs other tub setups?
Unlike alcove or drop-in tubs, freestanding tubs expose every detail of the plumbing. Small misalignments that would be hidden behind a panel become immediately noticeable, making precise planning essential. Understanding these trade-offs before installation helps homeowners anticipate layout constraints, access needs, and the impact of even minor drain offsets on performance.
Exposed-plumbing precision: small drain/supply errors that alcove tubs hide become visible leaks, wobble, or misalignment
Alcove tubs and many drop-ins hide rough-in sins behind an apron or access panel. Freestanding setups don’t. If the drain is off-center, the tub may not sit flat, the drain shoe may bind, or the tub may have to “float” slightly off its intended position. You end up noticing it every day because the tub is the focal point and sits out in the open.
In practice, the smallest errors show up as:
-
A tub that looks rotated to “catch” the drain
-
A tailpiece that’s stressed sideways (slow weeps later)
-
A filler that leans or wiggles
You give up access: once tile is down (especially on slab), fixes often mean demolition, not “adjustment”
Homeowners often assume the plumber can “just tweak it” later. With a freestanding tub rough-in, there may be nothing to tweak. If the trap is glued in and the floor is finished, a correction usually means:
-
Pulling the tub
-
Removing finished flooring
-
Cutting subfloor or concrete
-
Rebuilding waterproofing and tile
That is why the test-and-verify step matters more here than almost any other bathroom fixture.
Layout rigidity: tub placement becomes dictated by drain center + trap geometry more than by “best-looking” positioning
People plan the room around a pretty tub rendering, then learn the tub is now dictated by:
-
Where the main drain line runs
-
Where joists allow drilling (framed floors)
-
Where the vent can connect
-
Whether the trap can physically fit under the tub’s drain zone
That can force a tub to shift a few inches off the “perfect” spot. In a freestanding layout, a few inches is visually obvious.
Performance trade-off: longer tailpieces/odd offsets can drain slower or siphon poorly if venting and slope aren’t right
When installers try to “save” a rough-in that’s not in the right place, they often use longer tailpieces, extra fittings, or odd offsets under the tub. Every extra turn is another place to collect hair/soap and another place that can siphon or gurgle if venting is wrong.
You can end up with:
-
A tub that drains slowly even though the pipe is “new”
-
Gurgling when nearby fixtures drain
-
Sewer smell from trap seal loss (often a venting issue, not the tub itself)
What existing-home conditions decide whether this is easy or a teardown?
Before tackling a freestanding tub rough-in, it’s crucial to assess the existing home conditions. Floor type, ceiling access, and the age or material of the plumbing all influence whether a drain adjustment is simple or a major teardown. Understanding these constraints ahead of time helps prevent surprises and ensures any modifications fit both the tub and your home’s structure.

Slab vs framed floor: when “no access below” turns a 1-hour correction into cutting concrete back to the main line
On a framed floor with access from below, moving a drain for a new bathtub might be a straightforward re-route. On a slab, the same change can become a concrete-cutting project.
Where people get burned is assuming the drain riser location is the whole job. On a slab, the hard part is often the P-trap location and the pipe run needed for slope. If the drain stub comes up too close to where the trap must sit, you can’t “fold” a trap into the slab without space.
If you are on slab, plan around this reality:
-
Any meaningful drain move may require saw-cutting, excavating, and patching
-
Dust control is real work
-
The final patch must support the tub and finished floor without settling
Upstairs/finished ceiling below: when moving a drain for a new bathtub requires opening ceilings, drilling joists, or rerouting venting
On an upper floor, you might have access from below—until you realize the “below” is a finished kitchen ceiling.
Common constraints:
-
Joist direction blocks where you can run a trap arm
-
Joist drilling limits can prevent “just one more inch” of movement
-
The vent tie-in location may force a longer trap arm than allowed in your area
If you’re not willing to open the ceiling, you need the rough-in to be correct before finishing the bathroom floor above. Otherwise you’re choosing between living with a compromised drain or opening ceilings later.
Old pipe materials and transitions: when ABS/PVC or mixed systems create joint-failure risk unless transition methods match the materials
A freestanding tub drain assembly often ends up with a mix: the tub’s drain parts, a trap, and the home’s existing drain piping. Older homes can add cast iron, copper, or mixed plastics.
This becomes a failure point when:
-
Wrong cement/primer is used for the pipe material
-
A “universal” method is used where a listed transition is required
-
Old pipe is brittle and cracks when you try to rework it
The result is rarely an immediate flood. More often it’s a slow weep that shows up as a ceiling stain or a musty smell weeks later.
Wet-room realities: when humidity, insufficient ventilation, or no vapor control makes exposed penetrations and caulk joints fail sooner
Freestanding tubs often sit on tile with penetrations for a drain and sometimes a floor-mount filler. Those penetrations and caulk lines live in a humid zone (based on guidance from the U.S. Department of Energy on bathroom ventilation).
If the bathroom ventilation is weak, you tend to see:
-
Moldy caulk at the tub feet
-
Water sitting around floor penetrations
-
Movement-related cracks opening and closing (letting water into the floor)
This matters because freestanding setups usually have less forgiveness. A little water migration under tile can damage subfloor or loosen tile over time.
Can your drain, trap, and vent physically fit where the tub needs them? (Center/offset reality)
Even small misalignments can force offsets or extra fittings, so mapping the footprint and considering center versus offset positions ensures the plumbing fits without compromising function or stability.
Center drain tub plumbing guide: mapping the tub’s drain-to-footprint and defining the “allowable landing zone” on the floor
A “center drain” freestanding tub rarely means the drain can be anywhere near the center of the tub footprint. You need to map the actual drain location relative to the tub’s outer edges and feet.
Do this before any rough-in is finalized:
-
Get the tub’s drain location dimensions (from the tub’s spec sheet).
-
Mark the tub footprint on the subfloor with tape.
-
Mark the exact drain centerpoint within that footprint.
-
Now draw an “allowable landing zone” circle around it based on what the drain connection can tolerate.
In real installs, your allowable zone might be small because:
-
The tub drain shoe needs to drop straight
-
The trap connection below needs alignment
-
The tub base or feet block where fittings can sit
Key point: The drain riser does not just need to be “close.” It needs to land where the tub’s drain assembly can connect without side-loading the seal.
What happens if my rough-in is too close to the tub center?
This surprises people: “too close to center” can be worse than slightly off.
Why? Because a P-trap is not a flat part. It has a body, a bend radius, and fittings. If the drain comes up exactly where the trap body needs to sit, you have nowhere to put the trap without pushing it sideways or adding tight turns.
Common outcomes:
-
The plumber adds extra elbows to “shift” the trap. That can reduce flow and clog sooner.
-
The trap ends up partially under a tub foot or base rib, so the tub can’t sit down.
-
Slab warning: the typical correction is cutting concrete back far enough to relocate the trap and trap arm properly (not just shifting the riser).
If you’re planning a floor drain for freestanding bath on slab, don’t think only in terms of the drain hole. Think: “Where can a trap physically live?”
Freestanding tub drain offset: when a small offset saves the install vs when offsets create slow drainage or sealing problems
A freestanding tub drain offset (using an offset fitting to bridge a small misalignment) can be a legitimate save when:
-
The offset is minor
-
The slope remains correct
-
The offset does not force the tailpiece or drain shoe to bind
-
The connection type remains serviceable (or at least testable)
Offsets become a problem when:
-
They create a flat spot or back-pitch that holds water and sludge
-
They require extra joints under a tub with no access
-
They push the trap arm into a too-long or poorly vented run
This is where “Can I use a flexible drain pipe?” comes up. Flexible drain connectors are tempting because they can “reach” a misaligned rough-in. In many areas they are not accepted for concealed, permanent tub drainage, and even when allowed they can trap debris and are hard to clean. They also don’t solve venting or slope mistakes. If your plan depends on flex to make the geometry work, treat that as a warning that the rough-in is not actually compatible.
Venting and trap rules that get missed: when skipped testing or bad vent placement shows up only after tile is installed
Freestanding tubs don’t vent differently because they’re freestanding; they vent like any other bathtub. The failure is usually that venting was treated as an afterthought during a drain move.
What tends to happen in practice:
-
The trap arm gets longer to reach the old vent connection
-
The vent tie-in ends up too far away or configured incorrectly
-
The tub seems fine until you fill it and dump a full tub of water, then it gurgles or pulls the trap seal
Confirm before moving drain: Validate trap-arm length limits and vent tie-in feasibility during layout, not after drain relocation.
If your freestanding tub plumbing rough-in involves moving the drain, confirm the vent plan at the same time—not after the floor is finished.
Also, testing matters. A leak in a glued fitting or a slow seep at a connection might not show until the tub drains a large volume. If you skip a real fill-and-drain test before closing the floor, you are betting your tile job on a guess.
Will the water supply rough-in work for a floor-mounted filler (clearance, height, pressure)?
Even if your drain and trap are perfectly placed, the floor-mounted filler adds another layer of planning. Valve height, handle reach, and water pressure all affect usability, so it’s important to verify clearances and flow before committing to the rough-in.

Valve height and handle clearance: when “per spec” still feels cramped (and why too-low valves look and function wrong)
Many floor-mounted fillers are drawn at a certain valve/handle height that technically works. Real use is different.
If the handles land only a couple inches above the tub rim, you may see:
-
Knuckles hitting the rim when turning water on/off
-
Users turning handles at an awkward angle
-
A “crowded” look that makes the filler feel like it was placed as an afterthought
This is one of those details that doesn’t show on a rough-in plan but becomes obvious the first time you use it. Confirm the rim height of your tub, then mock up the filler handle height using the actual tub rim height and filler spec dimensions before the rough-in is fixed.
Spacing between filler and tub rim: when reach, splash, and hose routing force you to move the tub—not just the pipes
The filler has to be far enough away to:
-
Clear the rim and any rolled edge
-
Allow the spout to reach the fill area without splashing outside the tub
-
Leave room for cleaning around the base
-
Route any hand spray hose without kinking (if included)
A common regret is roughing in the filler, then realizing the tub must shift to make the filler usable. But the tub can only shift if the drain zone still lines up.
So check this as a system:
-
Tub position that satisfies drain and trap
-
Filler position that satisfies clearance and reach
-
Door swing and walkway clearance around the tub
Is this still a good idea if my water pressure is low?
Low pressure doesn’t make rough-in impossible, but it changes your experience.
Freestanding tubs often have large volume. If your water pressure is low (or supply piping is undersized, or you have pressure-reducing valves set low), the tub may take a long time to fill. That becomes annoying quickly.
Before committing, do a simple test:
-
Time how long it takes to fill a known volume at the nearest tub/shower valve or laundry sink.
-
If it already feels slow, a larger tub with a floor-mounted filler may feel worse.
Also remember: some fillers have higher flow needs to feel “normal.” If your home barely supports decent shower flow, don’t assume a big freestanding tub will be satisfying without supply upgrades.
Anchoring and rigidity: when a loose floor-mount filler telegraphs movement into leaks at the floor penetrations
A floor-mounted filler must be anchored to something solid. “Solid” means more than tile.
If the filler base is only supported by tile over backer board, it can loosen. Every small movement stresses:
-
The supply connections
-
The waterproofing at the floor penetration
-
Any sealant around the base
Over time, that movement can cause intermittent leaks that show up as staining below or loose tiles around the base.
Explicit directive: plan structural blocking/solid anchoring for framed floors or the correct embedment method for slabs before setting the finished floor height.
If you’re on a framed floor, plan blocking. If you’re on slab, plan the correct embedment method and keep the finished-floor height in mind so the filler doesn’t end up proud or recessed.
What measurements must be verified before any glue, tile, or concrete patch?
Before committing to glue, tile, or concrete, every key measurement should be confirmed. From drain center to rim height, filler spacing, and floor buildup, even small misalignments can create major problems once the floor is finished. A careful dry-fit ensures the tub sits level, the P-trap clears, and all offsets work—preventing costly corrections later.
Minimum measurement set to record:
-
Tub footprint edge-to-drain center (from spec sheet)
-
Rim height
-
Finished-floor build-up thickness
-
Filler-to-rim spacing
-
Rough-in hot/cold offsets (per filler specs)
Dry-fit protocol: setting the tub, leveling, marking, then verifying riser centering before gluing (especially with no subfloor access)
Mandatory step: Verify P-trap body clearance and trap-arm path (including slope) within the tub’s drain zone before any glue/patch.
If you do only one thing to prevent regret, do this.
A workable dry-fit protocol:
-
Set the tub in the planned position (on protective pads so you don’t scratch the floor).
-
Level it the way it will be leveled permanently (shim if the tub design allows, or correct the floor if not).
-
Mark the tub outline and drain center on the floor.
-
Confirm the drain riser is centered in the hole and lines up with the tub drain assembly requirements.
-
Confirm the tub can fully seat without rocking and without contacting the riser or fittings, and that the P-trap body and trap-arm path (including slope) have sufficient clearance within the tub’s drain zone.
On slab or any “no access below” condition, this step is not optional. Once you glue and patch, your adjustment options drop close to zero.
Floor height build-up and leveling: when uneven subfloors or wrong finished-floor height prevents the tailpiece from sealing
Finished floor height changes everything:
-
Tile + thinset
-
Waterproofing layers
-
Mortar beds
-
Heated floor assemblies
If the drain assembly expects a certain tailpiece engagement and the floor ends up higher or lower than planned, you can get:
-
Threads that barely catch
-
A gasket that doesn’t compress correctly
-
A connection that feels tight but isn’t sealed under real draining volume
Also, freestanding tubs often show floor unevenness. A small slope that would be hidden under an alcove tub can create rocking or gaps at the feet. That rocking is not just cosmetic—it can stress the drain connection.
Tolerance plan: how much misalignment you can realistically absorb (and when ±1/4" becomes a full redo on slab)
People hear “a quarter inch is fine.” Sometimes it is. Sometimes it’s a tear-out.
What decides it:
-
Connection type (compression, gasketed, solvent-welded)
-
Whether the drain assembly can tolerate a slight angle
-
Whether the tub base blocks your ability to swing fittings
-
Whether you have access below to fine-tune
On a framed floor with access, you can sometimes absorb small errors with careful fitting. On a slab, ±1/4 inch can be the difference between a clean install and breaking concrete, because you can’t shift the trap body after the patch.
Don’t rely on “it’ll pull into place.” Side-loading a drain seal is a classic way to get a slow leak later.
Leak/pressure testing sequence: testing trap, vent, and connections “live” before covering so failures don’t become tile rip-outs
Specific test sequence checklist:
-
Fill the tub fully, then dump, repeat
-
Inspect all visible joints for leaks
-
Verify no gurgle or siphon occurs
-
Perform testing before the last irreversible step (tile, slab patch, or ceiling close)
At minimum, aim for:
-
A real water test of the drain path (fill and dump, more than once)
-
A check for weeping at every joint you can see
-
Verification that the tub drains without gurgling or siphoning
If you have access below, watch the trap during the test. If you don’t, this is where you slow down and test before the last “point of no return” step (closing a ceiling, patching slab, setting final tile).
Skipping testing is how small glue mistakes turn into major finish damage later.
What does it cost to make this work when the rough-in doesn’t match the tub?
When the rough-in doesn’t align with your freestanding tub, costs aren’t just about plumbing parts—they quickly balloon with floor, slab, or finish work. Even small offsets can cascade into concrete cutting, vent adjustments, or ceiling openings. Understanding the potential repair scope early helps homeowners weigh whether to force a fit or choose a tub and layout that naturally match the existing rough-in.

Moving a drain for a new bathtub: cost bands by scenario (minor offset vs trap relocation vs breaking slab back to the main)
Costs vary by region and access, but the pattern is consistent: access drives price.
Typical cost bands homeowners run into:
-
Minor correction with access (framed floor, open below): often a few hundred to around $1,000 if it’s a small re-route and vent is easy to tie in.
-
Trap relocation with limited access (some ceiling work, moderate re-route): commonly $1,000–$2,500, especially if venting needs changes.
-
Slab work (cut, dig, move, patch): often $2,000–$6,000+ depending on how far back the main line is, how deep the slab is, and what finishes must be protected.
The surprise cost is often not the plumber—it’s the restoration: concrete patching quality, waterproofing rebuild, tile matching, and labor coordination.
Finish work multipliers: when tile, waterproofing, and heated floors turn a plumbing correction into a remodel
If you already have:
-
Specialty tile
-
Curbless wet area waterproofing
-
Heated floor wires/mats
-
A finished ceiling below
…then a “simple drain move” can cascade into a multi-trade repair.
This is why the correct sequence matters. Don’t let anyone lock in tile layout before the drain and tub location are proven. A perfect tile job over the wrong rough-in is still the wrong rough-in.
Tools and access costs: coring, concrete cutting, dust control, and patching that DIY budgets often miss
Slab corrections can require:
-
Concrete saw cutting or coring (and safe silica dust control)
-
Breaking and hauling debris
-
Excavation to expose pipe
-
Proper backfill and patch support under a heavy tub
DIY is possible for some homeowners, but the risk is not just “messy.” It’s ending up with a patch that settles, cracks tile, or leaves the tub rocking—then you’re fixing plumbing and finish work again.
When a simpler option is the better choice: selecting a tub/drain configuration that matches the existing rough-in to avoid structural work
Sometimes freestanding tub plumbing rough-in is unnecessary for the house you have.
If your existing drain and vent are in a place that would require slab excavation or major joist work to “perfect,” a simpler choice can be:
-
A tub with a drain location that matches the existing rough-in better (within the drain zone)
-
A different tub placement that works with the trap geometry
-
A non-floor-mounted filler if the supply rough-in is the real constraint
This is not about settling. It’s about avoiding a structural or finish teardown when the functional goal (a reliable tub that drains well and doesn’t leak) can be met with less risk.
What fails over time, and what ownership constraints come with this rough-in?
Even when the rough-in is perfectly installed, freestanding tubs demand ongoing attention. Small movements, minor settling, or imperfect floors can slowly compromise seals, slip joints, and caulk at the feet. Understanding these failure points—and whether you’ll have future access—shapes both maintenance expectations and the “ownership constraints” of living with a floor-mounted, freestanding tub.
What fails first over time: seals at the drain shoe, slip joints, and movement at the tub feet on imperfect floors
Freestanding tub failures are often slow and boring:
-
A drain shoe gasket that was slightly side-loaded
-
A slip-joint that loosened after minor tub movement
-
A tub foot that slowly settled into grout or a slightly soft patch
You may not see a puddle. You may see:
-
A faint stain on the ceiling below
-
A musty smell near the tub
-
Caulk lines that keep cracking at the feet
If your tub rocks even a little when empty, assume it will move more when filled with water and a person. That movement is what works seals loose over time.
Chemical and material compatibility: when wrong primer/cement or bad ABS/PVC transitions crack or weep months later
Mixed materials are common in remodels. The failure shows up later when:
-
The wrong solvent cement was used for the pipe material
-
A transition was done in a way that isn’t meant for concealed locations
-
Old plastic was stressed during rework and develops hairline cracks
These problems can pass an initial test and still fail months later. That’s why correct materials and correct transition methods matter more in freestanding installs—because access later is harder.
Cleaning and service access: when you can’t reach the trap or connections without lifting the tub (and what that implies for caulk and flooring)
A frequent homeowner question is “Do I need an access panel in the floor?”
You might not need one by code in every area, but you do need a service plan.
If there is no access:
-
Any trap service may require lifting the tub
-
Lifting the tub may require cutting caulk at the feet
-
Cutting caulk risks damaging waterproofing details at the floor
-
Re-setting the tub risks reintroducing drain stress if it doesn’t land exactly the same
If you can access the plumbing from below (unfinished basement or accessible ceiling), life is easier. If you cannot, be honest about what a future drain repair looks like.
Long-term stability: how minor wobble, settling, or floor flex turns into recurring leaks and re-caulking cycles
Freestanding tubs are heavy when filled. If the floor system flexes (framed floors) or the slab patch settles (slab work), you can get a cycle:
-
Tub shifts slightly
-
Caulk opens at feet or penetrations
-
Water gets where it shouldn’t
-
Finish loosens or smells develop
-
You recaulk, but the movement continues
The fix is not better caulk. The fix is making the tub stable and the penetrations properly detailed before final finish.
Before You Buy checklist
-
Confirm slab vs framed floor and whether you have access below; if not, plan as if adjustments are impossible.
-
Dry-fit the tub and mark the true drain center from the tub’s spec sheet, not from the room layout.
-
Verify there is physical space for a P-trap under the tub’s drain zone (especially if the rough-in is near exact center).
-
Account for finished floor build-up so the tailpiece and drain seal will compress correctly after tile/waterproofing.
-
Confirm the vent plan at the same time as the drain move; don’t assume the existing vent location will work.
-
Mock up floor-mount filler location for handle clearance, door swing, and rim spacing before rough-in.
-
Plan a real fill-and-dump water test before closing floors/ceilings or patching concrete.

FAQs
1. Does the drain need to be perfectly centered?
Not at all. The key is that the drain lands somewhere within the tub’s “allowable drain zone” so the drain assembly fits without being stressed. Ironically, aiming for dead-center can sometimes create more problems, especially if the P-trap body ends up with no room underneath. It’s better to focus on clearance for the trap, proper slope, and alignment with the vent. A slight offset is often fine, as long as everything connects cleanly and the tub sits flat. Planning this carefully before any tile, glue, or concrete work will save headaches later.
2. Can I use a flexible drain pipe?
Flexible drain connectors might look like a quick fix when the rough-in is slightly off, but they’re rarely ideal for long-term use. They can trap debris, make cleaning harder, and may not be approved for hidden tub drains in many areas. If your layout depends on flex to make the connections, it’s usually a sign the rough-in isn’t compatible with the tub. Instead, it’s better to confirm the drain, trap, and vent geometry first, then adjust placement or choose a tub that matches the existing rough-in. Flex should be a last resort, not the plan.
3. How do you vent a freestanding bathtub?
Venting a freestanding tub isn’t fundamentally different from any other tub, but it’s easy to overlook. The trap arm needs to connect to a properly sized vent within code limits. Issues often arise when someone moves the drain and the trap arm ends up too long or the vent tie-in is awkwardly far. A vent that’s improperly positioned can lead to gurgling, slow draining, or even trap seal loss. Checking vent feasibility during the planning stage—and doing a fill-and-drain test—is crucial. This ensures your tub drains smoothly and avoids surprises after tile and flooring are finished.
4. Do I need an access panel in the floor?
Not always by code, but having some form of service plan is critical. Without access from below, any future work on the trap could mean lifting the entire tub, cutting caulk, or even disturbing tiles and waterproofing. That’s time-consuming, messy, and risky for the finished floor. If you have an accessible basement or ceiling, maintenance is much simpler. Even if it’s not required, thinking about how you’d reach the trap or connections in the future will save a lot of stress. Planning for service upfront avoids expensive or destructive repairs later.
5. How far can the drain be from the wall?
Distance from the wall matters less than whether the drain, trap, and vent can physically fit under the tub with the right slope. A tub that looks great against the wall can still be a plumbing headache if it forces the trap into tight offsets or stretches the vent connection. The real focus should be on creating enough clearance for the trap body and arms, making sure the vent path works, and leaving room for proper alignment. Once the floor, tile, and caulk are in place, there’s almost no adjustment possible, so measure carefully first.
6. Can a DIYer do freestanding tub plumbing?
It’s possible for a skilled DIYer, but it’s definitely not a “quick weekend project.” You need to understand drain, trap, and vent geometry, ensure the floor can support the tub, and confirm alignment before any permanent work. On framed floors with easy access, minor adjustments are doable. On slab or finished floors, mistakes can mean cutting concrete or tearing out tile. Even experienced DIYers should plan for a dry-fit, full water test, and correct anchoring. If any of those steps feel daunting, calling a professional is often the safest choice.
7. Will my existing plumbing distances support this without major rerouting?
Existing plumbing can be a deal-maker or deal-breaker. If the drain, vent, and water supply line already line up with the tub’s footprint and allow room for the P-trap, you’re in luck. Small offsets may be manageable, but anything requiring long tailpieces, extra elbows, or vent extensions can slow drainage, cause gurgling, or increase clog risk. On slab floors, even minor misalignment can require cutting concrete. The bottom line: measure carefully, map the tub footprint versus the rough-in, and confirm that all lines can fit with proper slope and clearance before committing to finish work.
References


Leave a comment
This site is protected by hCaptcha and the hCaptcha Privacy Policy and Terms of Service apply.